Greetings and Salutations!
So between catching up on sleep and putting up the remaining Christmas ‘stuff’ I worked on the stock, as for this project it’s the thing that’s going to need the most attention cosmetically. Letting the stain cure overnight, and then the application of the oil, which needs to be rubbed in, allowed to set, then another application… wash rinse repeat until I’m happy with the finish.
I sanded it pretty much all night. It came out looking like this:
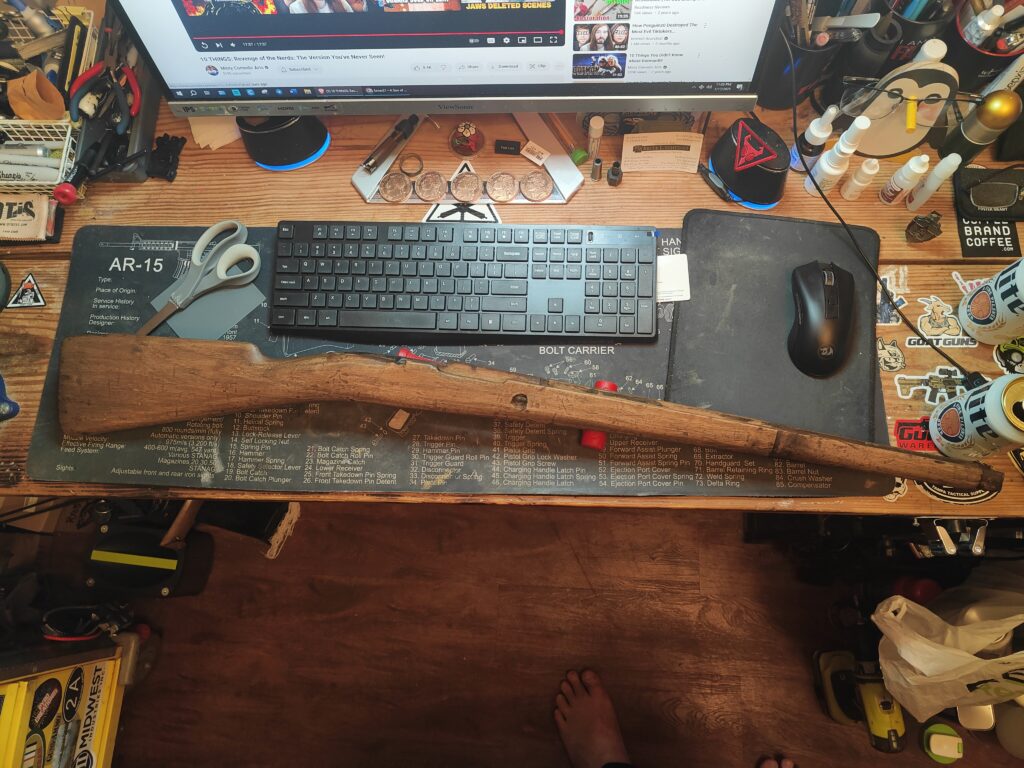
I worked my way up from 600 grit to 2500 progressively. It took a lot of the nasty ground-in grime, as well as (unfortunately?) removed the water damage and water mark:

Unfortunate in that it was a unique ‘marking’ on this particular rifle and part of it’s history. Sometimes though, you have to deal with the good and the bad… Also, that triangular stamp in the wood?
No idea.
Any of you have a clue? It’s original, and came out very clearly as you can see once I got the crud off of it. It looks like a ‘Delta’ emblem, but with one little ‘wing’ off the top that is NOT present on its opposite side. I looked around quite a bit and didn’t find any reference to such a marking, so I’ll file that as ‘currently unknown’.
Around 0200 I called it a night on the sanding, and then went with a nice medium brown stain that’s close to the original colors before crashing:
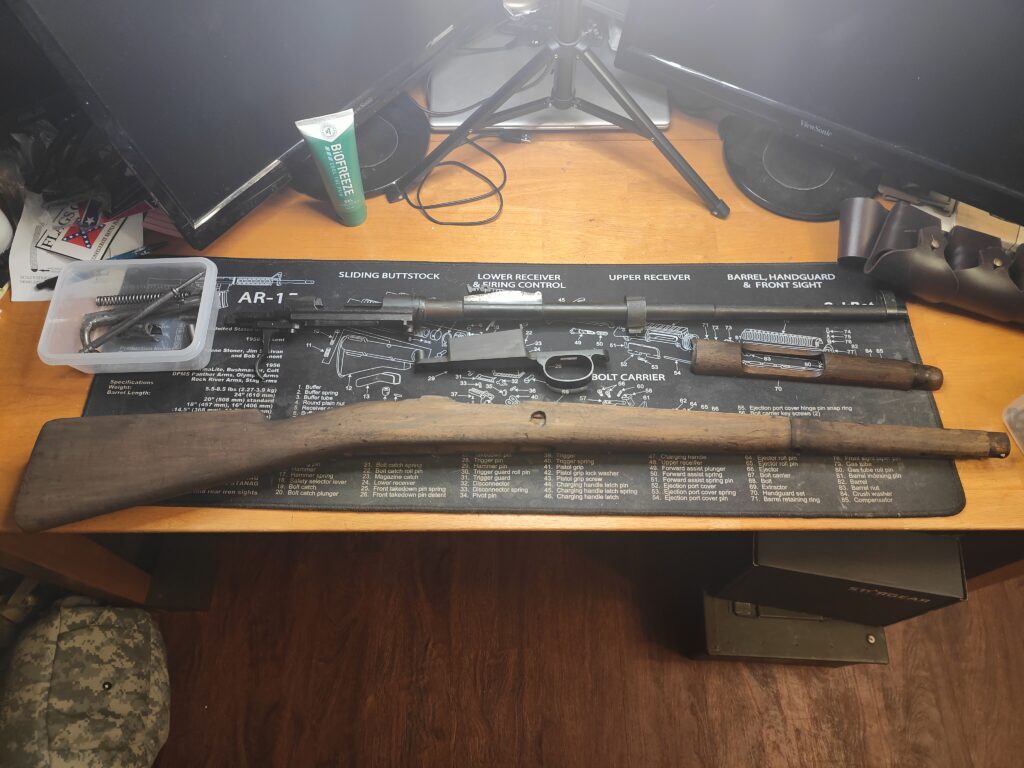
A nice even coat, and I went to bed.
This AM, I did a rub down with the oil every two hours. The initial rubdown practically ‘drank’ the oil in. In total I did four applications, all hand massaged in, and it came out looking like this:

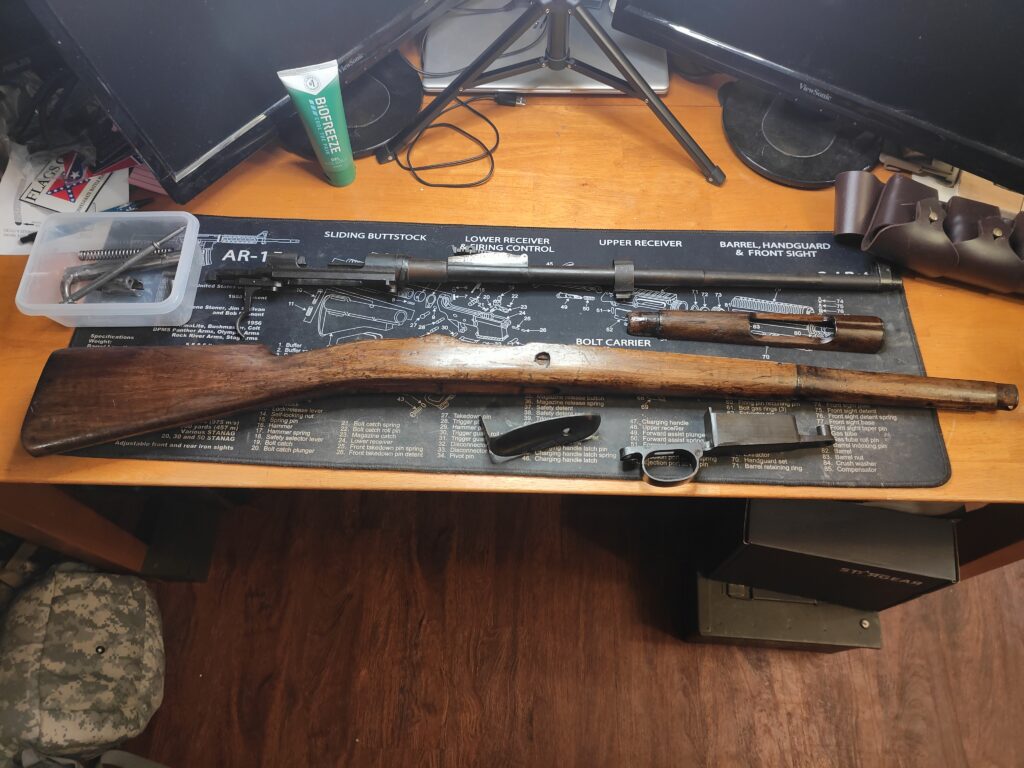
I’m rather pleased.

The only complaint I have so far is that it’s in such magnificent shape! My reasons for this is at this rate, I’m going to be done aesthetically speaking very quickly. It’s going to look like a new-issue rifle, or at least one that’s been maintained scrupulously over the years with an eye for preservation. Not that SG and his dad didn’t maintain it, in fact they did, which is part of why this’s going to end up being a quick job as opposed to the 7 week full time gig the SMLE was.
The next part was working on the bolt. That’s going to get the full treatment over the long stretch, both in mechanical measurements and functionality, as well as getting a full on polishing when I’m ready. Scoutergreg mentioned to me something about the firing pin and problems, and I think I already found where one of the problems is/was.
I tore the firing pin down after watching a YouTube video. My Lord, as an aside: what a useful thing to have sometimes. I’m learned how to do the brakes on my 2020 Hyundai, tear down a Lee Enfield Bolt, and now a M1916 Spanish Mauser bolt, as well as a plethora of ‘other needful things’ over the years. What a resource!
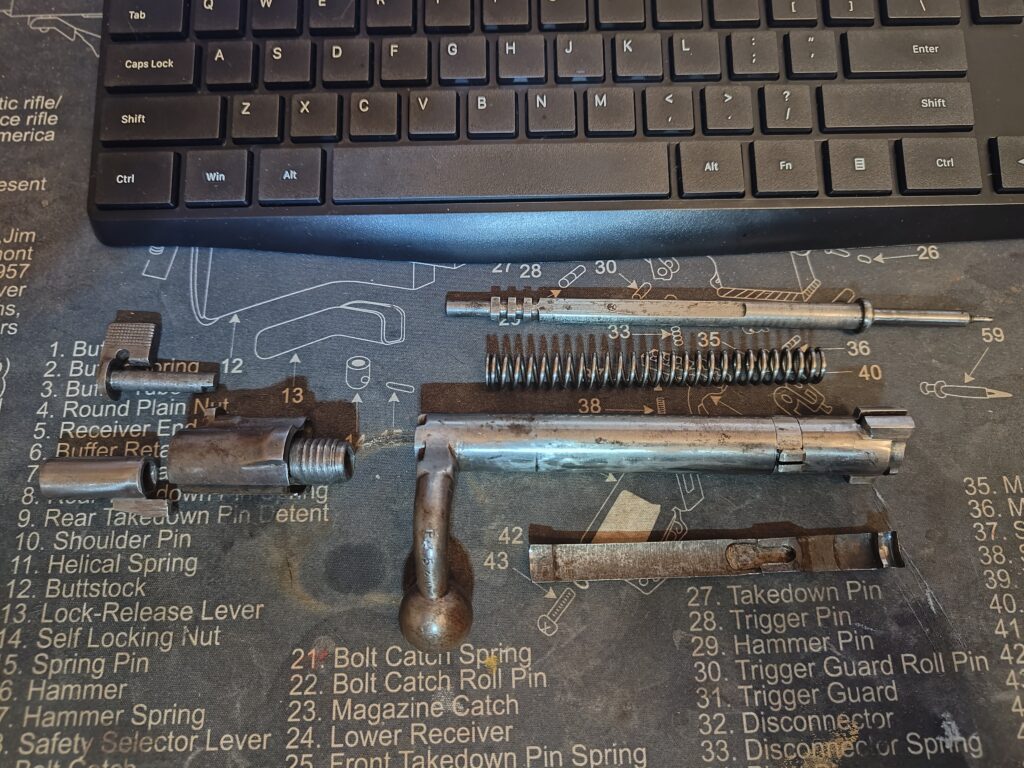
That’s from the right-after-disassembly pick, before clean up. It was pretty grungy. Not too bad for its age, as I’m sure Scoutergreg and his dad cleaned it up to a ‘user level’ but I don’t think it’s been stripped down like that since it’s last depot maintenance trip in 1916 or 1930.
So the issue I discovered on tearing it down was after removing the cocking piece (which is under some serious spring pressure,) it kept getting hemmed up inside the bolt sleeve.
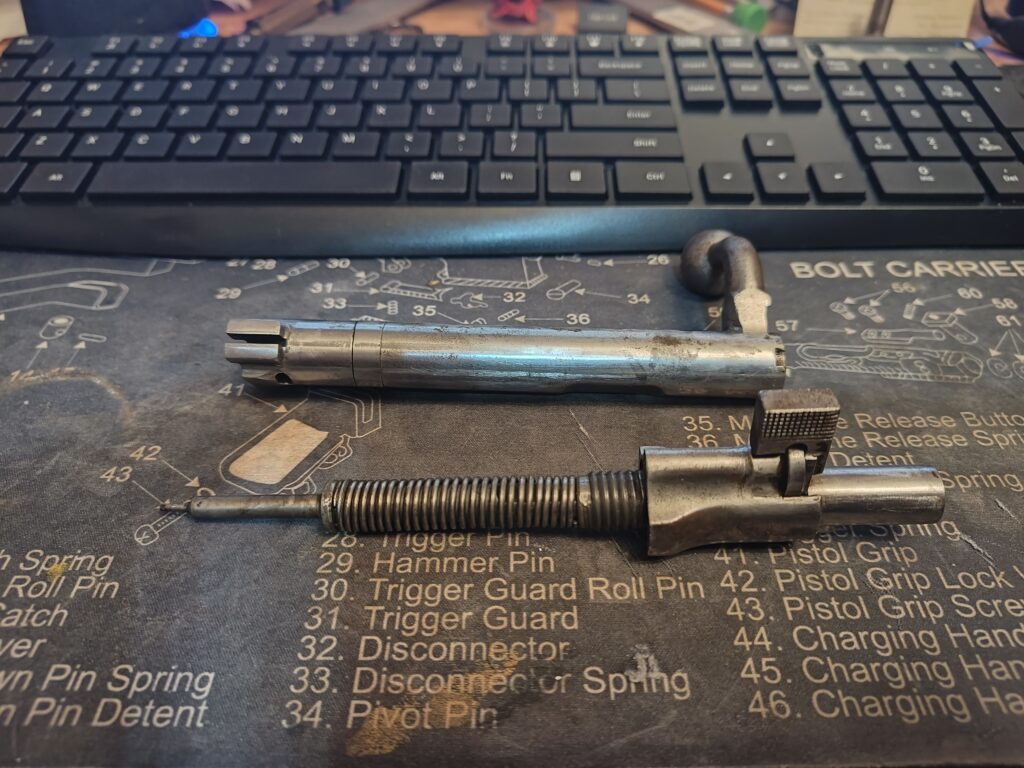
The firing pin sits under pressure. To remove the pin, one pushed down on the firing pin itself using the bolt sleeve. The sleeve compresses the spring, and the cocking piece can be spun to the left? right? can’t remember, but it spins, unlocking those lugs you see on the rear of the firing pin itself.
Now, theoretically once you remove the cocking piece the whole firing pin and spring assembly should slide out of the bolt sleeve. In this case, it was hung up and hung up pretty well. Took a little bit of finagling using a punch and a few light taps w/my hammer, but it came out. Once I got it out, I cleaned the Hell out of it all, and all the parts got the eye-loup examine for up close inspection.
Its got a way to go, but really cleaned up nicely with just some Rem-Oil from after the first pic
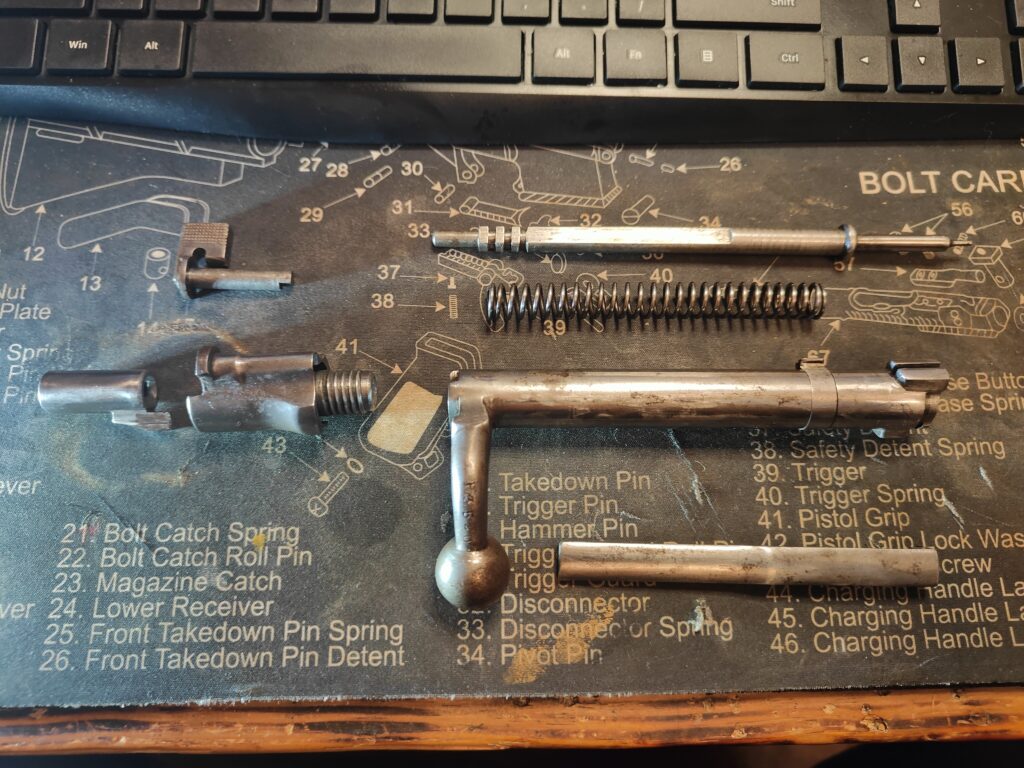
And as an FYI, the bolt sleeve is the part with the big threads on it to the rear of the bolt body, with the cocking piece to the left. The firing pin is at the top, and you can see the locking lugs on it.
The locking lugs were where the issue is/was.
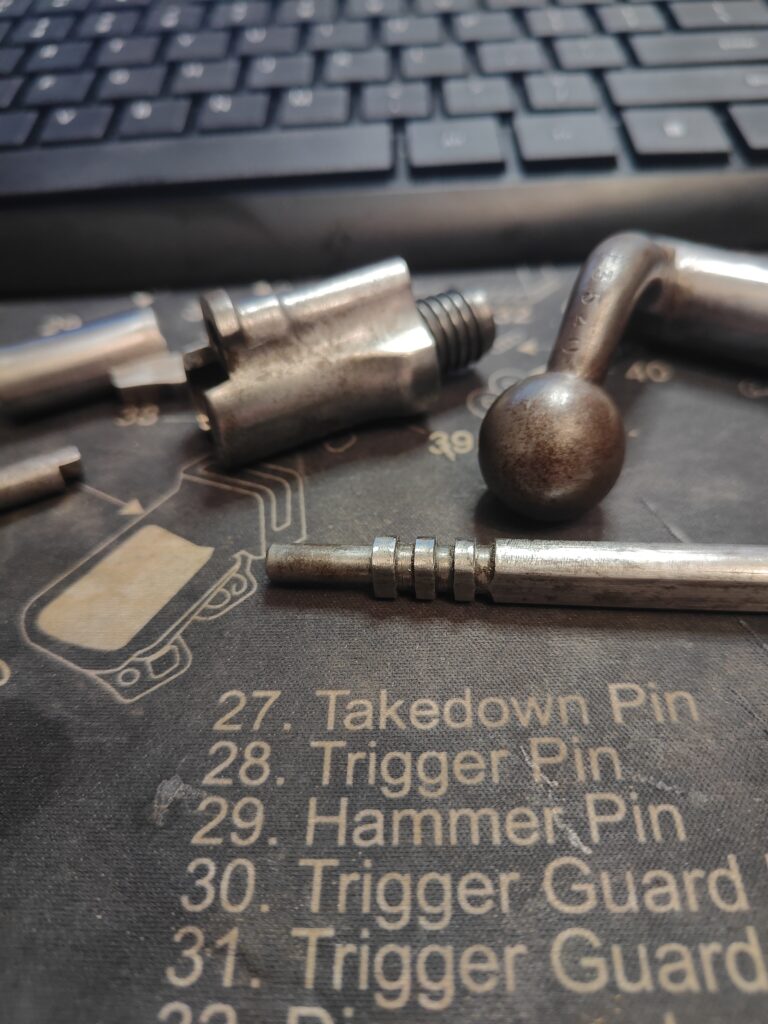
Checking to Mauser Boards, I found out that over time, the looseness inside the bolt sleeve could cause a bit of ‘mushrooming’ on the lugs. When I checked on mine, sure as Hell there was the faintest amount on there. Barely visable, but you could feel thing running your hand over it oh-so-lightly…
Seems that the mushrooming, over time, can be enough so as to cause it (the firing pin) to get hung up inside the bolt sleeve, which also could contribute to a failure-to-fire as when you pull the trigger, it goes click, the cocking piece goes forward, it sounds and looks like the cycle has completed, but instead you get either no strike or a soft strike on the primer as the firing pin got hung up inside the bolt sleeve juuuust a lil bit.
A couple of hits with a jeweler’s diamond file took care of that. Took all the mushrooming off nicely. It’s now all smoooothly running with no hitches or catches. Also I got a diagram of the firing pin itself today, and this one is still within spec, so that’s great.
Lastly I did decide to order a replacement rear sight bar and blade. A closer look shows the blade (rear sight blade that is) itself is soooo worn the hell down as to be functionally useless, and the one I found on Numrich was $20, and is ‘like new’ so unbent and unused? Works for me. Saves me the hassle of removing it, heating bending and treating it.
So that’s been my weekend so far.
Hope ya’ll have been having as good a one.
More Later
Big Country


2 in the pink one in the stink…
I am not going to say what I think that means.
Also known as “The Shocker” and its use can be found in a song by the hard rock band “Steel Panther”
Nice to find the issue was simple and easily fixed. Is it possible that mark on the stock is a worn down “A”?
This forum indicates it is in fact the letter A (similar looking pic) and that it might stand for Anarchists (and increase the value of the rifle significantly). For what it’s worth.
https://www.gunboards.com/threads/can-anyone-help-me-identify-this-mauser.1259097/
Karl Dahl’s fictional novel “Faction: With the Crusaders” is a great read about the Spanish Civil War. He’s a good friend of mine.
Not knowing the orientation exactly could the small triangle be caused by that part of a particular sling pressed against it as it got damp? You said you could see a slight warp, (I couldn’t really tell by the pics myself) at least without seein it fer realz.) Couldn’t really tell how deep it was, but the other thing that came to mind was a mark from a missing ……. unit id tag or armory tag? Would love to know if you find out. Are there plans for a short vid to watch it go bangity?
It’s German for saying Mahalo.
Ah, yes, Mahalo means “Trash” because it’s on the flapper of all tue garbage cans, of course!
And Mahu is USMC for “Shocker” judging by past performance…
Good progress, thanks for the update.
Oh my is that one sexy stock
file:///C:/Users/Joe/Pictures/my%20first.jpg
C:\Users\Joe\Pictures\my first.jpg
Dang it
“nasty ground-in grime”,are we talking the stock or your foot in first picture?
That said,looks real nice so far,and yes,as much as I at times despise it the net is also a great trove of useful information.
I’m still not happy with that .303, Tiny. Dont give up on it! I know you have lots of money and time…😂
Looking forward to a range report!
Errr… now ya need a Krag….👍
Will you oil the inside surfaces of the stock? I have yet to find a stock where a preservative has been used on the interior surfaces. So the moisture is sucked out of the wood from the inside — dry rot. I prefer Renaissance Wax on the interior; and exteriors of new wood.
I went thru a 3 day museum curators course at the Buffalo Bill Firearms Museum in Cody WY about 10 yrs ago, they used bowling alley wax on all their firearms. I saw mint condition M-14’s and BAR’s with light rust they didn’t remove, but they pushed for putting wax on everything.
Hey BC, long-time lurker. I talked to a firearms history buff…your triangle is a Mark of Proof denoting Spanish Air Force.
Hope this helps.
Beautiful, wish I had the skills you have….Meanwhile, Ukraine is over (except some more whining by the piano player)…Germany stopped all funding….
Sadly, it ain‘t over til it’s over.
And even then, it ain’t over.
No more Brother Wars.
I recall you mentioning SARCO for mauser bits (really cool store). Another great resource for future bolt action warhorses is http://www.libertytreecollectors. com. I called one time to clarify something and got the owner. Nice dude.
“Zwei im rosaloch, einer im Stinkloch” is better (two in the pink-hole, one in the stink-hole), since it gets the genders of the nouns right and doesn’t leave you sounding like an Ugly American.
If you go around saying that in Germany or anywhere else, it marks you as a filthy degenerate.
A good ‘AI’ source for mystery marks, etc. is https://openai.com/ I looked up what your triangle mark is, too much info to post here. Just ask and give details on the rifle.
When I was doing restore work on various rifles some 60 years ago I would soak the stocks in boiling hot water for several hours till the cosmoline floated free; I then went to work with scrapers and a rubber sanding block using medium grit wet/dry paper. I would then re-soak and scrape the fuzz off with a piece of glass and then apply Birchwood Casey with a big drop of walnut stain. Final polish was done with Rottenstone powder in a clean tee-shirt. Lots of work later and the finish was as smooth as glass
Yes, but too time consuming for most.
I also learned to use rottenstone, oil and a hard felt block for polishing the hardened oil finish down 40+ yrs ago. That’s what was considered a hand rubbed finish on a fine sporting rifle stock.
On a military rifle there’s no sense in all that hand polishing, I would use 0000 steel wool to rub off the gloss finish and call it good.